No Bake Chocolate Oat Bars That Feel Like a Hug in Dessert Form
No Bake Chocolate Oat Bars That Feel Like a Hug in Dessert Form
Introduction
There are desserts that show off, and then there are desserts that quietly become part of your life. These No Bake Chocolate Oat Bars fall squarely into the second category. They’re the kind of treat you make once on a calm afternoon and then find yourself thinking about again a few days later, usually when you open the fridge and remember they’re still there. Comforting, rich, and familiar, they feel like something that’s always existed, even if this is your first time making them.
No-bake recipes have a special charm. They don’t demand perfection, timing gymnastics, or an oven that behaves itself. They invite you to slow down just enough to enjoy the process. Stirring oats into warm butter and sugar, pressing layers into a pan, melting chocolate until it turns glossy and smooth. It’s simple work, but deeply satisfying.
These bars hit that perfect balance between hearty and indulgent. The oats give them structure and chew, the cinnamon adds warmth, and the chocolate-peanut butter layer brings everything together in the most comforting way possible. They’re sweet without being overwhelming, rich without being heavy, and sturdy enough to slice cleanly while still feeling soft and decadent.
They’re also incredibly versatile. These bars work just as well for an afternoon snack as they do for dessert, and they’re one of those recipes people ask for after the first bite. If you love treats that feel homemade, nostalgic, and reliable, these No Bake Chocolate Oat Bars deserve a permanent spot in your recipe collection.
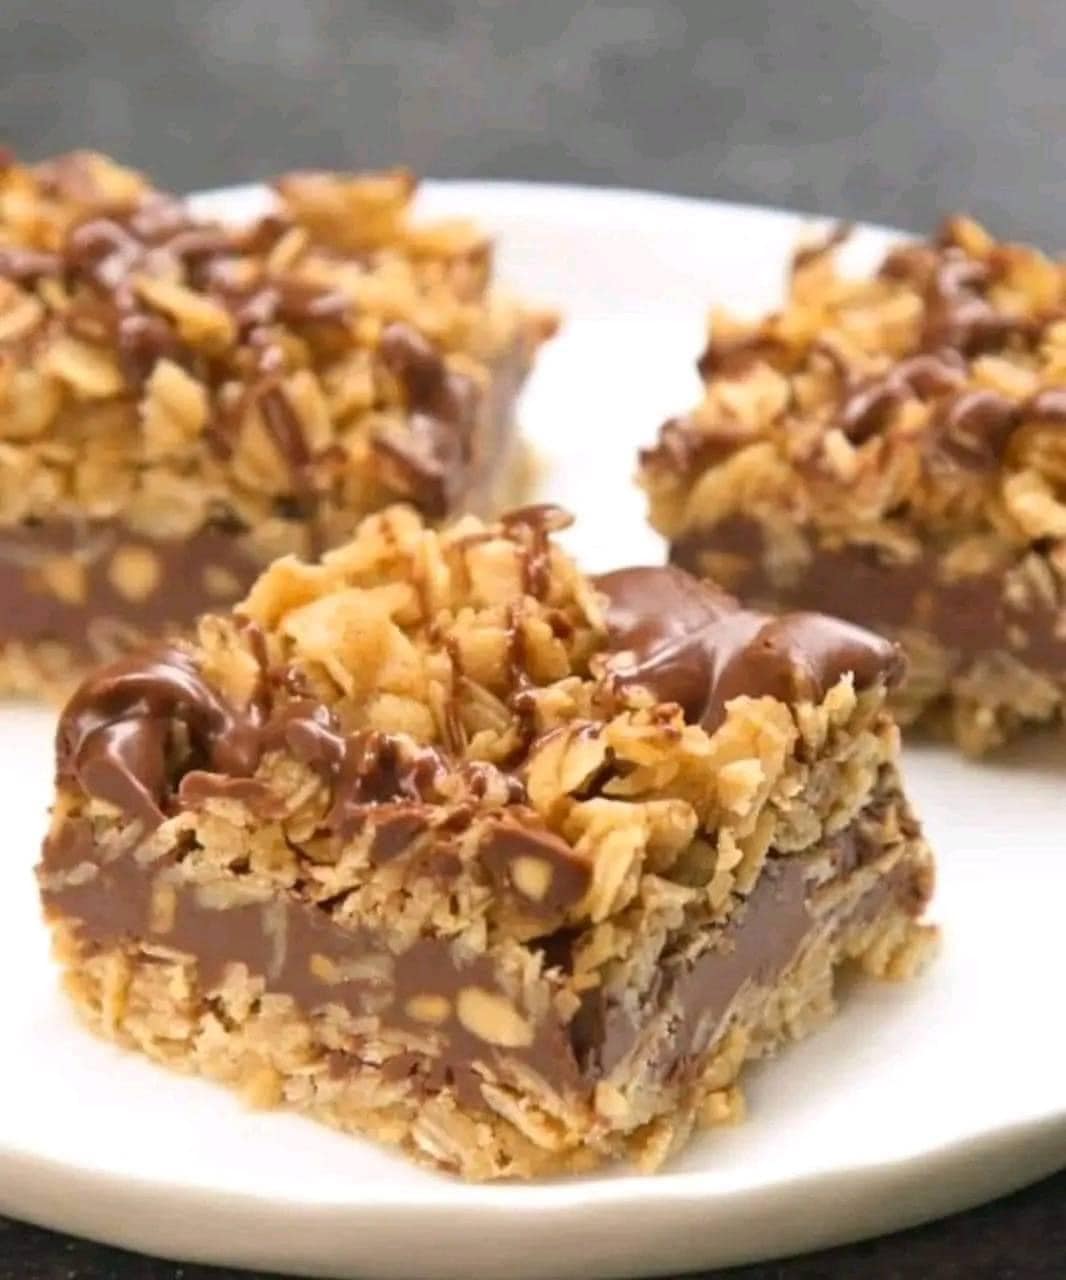
No Bake Chocolate Oat Bars 😍
Ingredients:
1 cup butter
½ cup brown sugar, packed
1 teaspoon pure vanilla extract
3 cups rolled oats
½ teaspoon ground cinnamon
¼ teaspoon kosher salt
1 cup dark chocolate chips
¾ cup chunky peanut butter
Directions:
Line a 8-inch-by-8-inch baking dish with parchment paper, and set aside.
In a medium saucepan, combine the butter, brown sugar and vanilla extract. Heat over low-heat, until the butter has melted and the sugar has dissolved.
Add the oats, cinnamon and kosher salt. Cook, stirring constantly, for 4 to 5 minutes.
Pour half of the oat mixture into the prepared baking dish. Spread out the mixture evenly, pressing down.
In a small microwave-safe bowl, combine the chocolate chips and the peanut butter. Heat on high in the microwave, in increments of 40 seconds, stirring in between each increment, until melted and fully combined.
Pour ⅘ of the chocolate mixture into the pan over the pressed oats, reserving about ¼ cup for drizzling. Top with the remaining oats and drizzle with the remaining ¼ cup chocolate mixture.
Refrigerate for 4 hours, or until set.
Tips for Perfect No-Bake Bars Every Time
These bars are wonderfully forgiving, but a few small details can take them from good to unforgettable. First, keep the heat low when melting the butter and sugar. You’re not trying to boil anything here, just gently dissolve the sugar so the mixture becomes smooth and cohesive.
When cooking the oats, constant stirring matters. This step lightly toasts them and helps everything bind together, giving the bars their signature chewy structure. Don’t rush it. Those few minutes make a noticeable difference in texture.
Pressing the oat layers firmly into the pan is another key step. Use the back of a spoon, a spatula, or even your hands. A compact base keeps the bars from crumbling once sliced.
When melting the chocolate and peanut butter, patience again pays off. Short microwave bursts and frequent stirring keep the mixture smooth and glossy instead of scorched or grainy.
Serving Ideas and When to Enjoy Them
These No Bake Chocolate Oat Bars are incredibly versatile. Serve them chilled for clean, sharp slices or let them sit at room temperature for a few minutes if you prefer a softer bite. They’re excellent as an afternoon snack, a lunchbox treat, or an easy dessert after dinner.
They pair beautifully with coffee, tea, or a cold glass of milk. Because they’re filling, a small square goes a long way, making them ideal for gatherings where you want something satisfying without being overly rich.
They also work wonderfully as a make-ahead dessert for holidays, potlucks, or busy weeks. Slice them into neat squares and arrange them on a platter, or keep them stacked in the fridge for easy grabbing.
Storage and Make-Ahead Tips
Once fully set, store these bars in an airtight container in the refrigerator. They’ll stay fresh for up to a week, and many people find they taste even better after the first day.
If stacking the bars, place parchment paper between layers to prevent sticking. For longer storage, these bars can be frozen. Wrap individual pieces tightly and freeze for up to two months. Thaw in the refrigerator or at room temperature before serving.
Because they’re no-bake, they’re an excellent option for preparing ahead of time. Make them the day before you need them and enjoy the convenience.
Frequently Asked Questions
Do I have to refrigerate them for the full 4 hours?
Yes, chilling time is important. It allows the layers to fully set and makes slicing much easier.
Why are my bars crumbly?
This usually means the oat layers weren’t pressed firmly enough. Pressing them tightly helps everything hold together.
Can I cut them into smaller pieces?
Absolutely. These bars are rich, so smaller squares work perfectly for serving.
Are these good for gifting?
Yes. They hold their shape well when chilled and travel nicely in airtight containers.